Romestead Resources Guide: Materials, Storage, Tools, and Logistics
A practical resource guide for Romestead players: what to protect first, how storage and carrying affect production, when to spend materials, and how to avoid building a settlement that looks busy but starves its own crafting chain.
On this page
The resource priority answer: protect the loop before chasing totals
The strongest way to read Romestead resources is to ask whether the settlement can keep moving after something goes wrong. A high material count is useful only if food, storage, carrying routes, tools, and repair inputs still support the buildings that depend on those materials. If one link breaks, the whole village can look active while important jobs sit idle.
For a new settlement, use a simple order: keep people fed, keep basic construction moving, keep repairs possible, then spend growth resources on buildings that reduce the next bottleneck. That order is more reliable than spending every new material as soon as it appears because Romestead is a survival settlement game, not a pure decoration builder.
This page intentionally avoids pretending that every exact value is permanent. Romestead can change through updates, so use the official Steam page and current wiki entries for live values. Use this guide for durable decisions: what to save, when to spend, where to store, and how to keep villagers from wasting time on long carrying paths.
First rule
Do not empty food, repair inputs, or basic building materials just because an upgrade button is available.
Second rule
Shorter carrying paths can be worth more than another distant production building.
Early resource priorities: food, basic materials, repair inputs, then upgrades
Food is the quiet foundation. If the settlement cannot feed its workers, every other resource plan becomes fragile. Watch food as a stability signal rather than an afterthought. A food surplus lets you recover from bad placement, wave pressure, or a new building that temporarily pulls workers away from production.
Basic materials are the second layer because they keep construction and repairs possible. Wood, stone, and other early materials should not be treated as trophies. Keep enough on hand to respond to damage and to finish essential buildings. Spending the last stack on a nonessential upgrade can turn a small problem into a long stall.
Growth resources matter once the base is steady. These are materials that unlock better production, storage, transport, or tools. Spend them when they remove a real bottleneck. If the current problem is hauling distance, a production upgrade may not help; if the current problem is slow crafting, more raw gathering may only make storage messier.
| Priority | What it protects | Spend when |
|---|---|---|
| Food | Worker uptime and recovery after pressure | Only after a stable surplus remains |
| Basic materials | Construction, repairs, and essential expansion | When the next building fixes a real constraint |
| Repair inputs | Recovery after zombie damage or layout mistakes | Keep a reserve before risky pushes |
| Growth materials | Storage, tools, automation, or stronger production | Spend when the current loop can absorb the change |
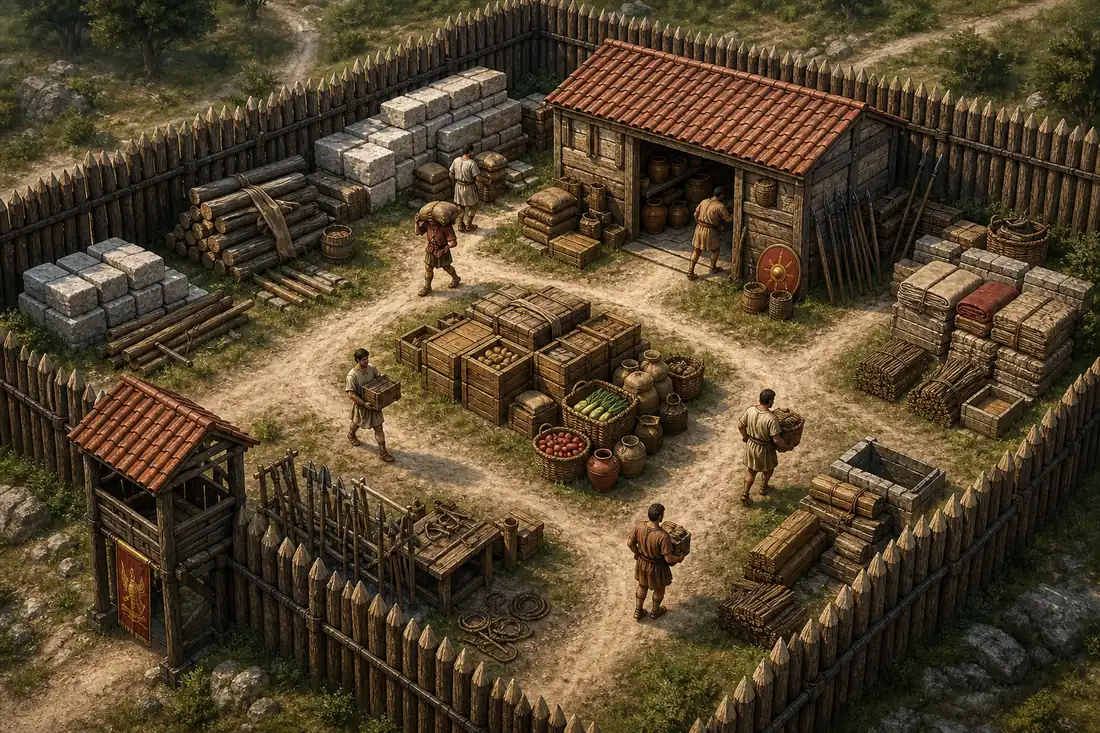
Storage and transport: resources are useful only when they are reachable
A resource in the wrong place is almost the same as a missing resource. Romestead emphasizes carrying, transport, and settlement layout, so distance can become a hidden tax on every task. If villagers walk too far between gathering, storage, crafting, and repairs, production slows even when the inventory screen looks healthy.
Place storage close to the jobs that use it. Early storage should support food, basic building materials, and repair materials before it supports low-priority stockpiles. If a storage area is far from both input and output jobs, it may create more walking than it solves. Watch where villagers actually travel, then adjust layout around those routes.
Transport upgrades, carts, and specialized movement systems should be judged by time saved, not by how impressive they look. The best logistics improvement is the one that lets the same workers complete more useful tasks with fewer wasted steps. That is especially important before waves or boss preparation, when repair materials and food need to be easy to reach.
| Logistics problem | Symptom | Fix |
|---|---|---|
| Storage too far away | Workers spend more time walking than crafting | Move key storage closer to production and repair zones |
| Too many loose priorities | Materials pile up but essential jobs still stall | Separate critical, growth, and optional stockpiles mentally |
| Expansion outruns hauling | New buildings sit idle or starve older jobs | Add storage or transport support before widening the base |
Tools and crafting queues: solve the bottleneck before adding another job
Tools matter because they turn labor into useful output. If a job needs a tool, workstation, or crafting step, assigning more villagers to the area will not help until that dependency exists and is reachable. Before adding a new production target, check whether the current chain has the inputs, tools, storage, and worker time needed to finish.
Crafting queues should stay short enough that you can see what is blocking them. A long queue of attractive upgrades can hide the one material or tool shortage that matters most. If everything is queued, nothing is prioritized. Put the next survival-critical item first, then the next logistics improvement, then the optional upgrade.
This is where a resource guide differs from a simple item list. A wiki table can tell you what a resource is; a good plan tells you whether crafting it now will reduce pressure. If the settlement is short on food or repair materials, a shiny upgrade that consumes the same carrying and crafting time may be the wrong move.
Good queue
One survival-critical item, one logistics improvement, then optional upgrades after the loop stabilizes.
Bad queue
Several attractive projects fighting for the same tools, workers, and materials.
Automation and town logistics: expand after the flow is proven
Automation is strongest when it supports a clean flow that already works. If the manual version of a production chain is scattered, automating it may only automate the mess. Before investing in bigger systems, confirm that inputs arrive, outputs are stored, and workers can repair or defend the area without abandoning essential jobs.
Think in zones: food support, building materials, crafting, repair, and defense preparation. Each zone should have a reason to exist and a clear relationship to storage. A village that grows in zones is easier to repair, defend, and upgrade than a village that grows as a collection of isolated buildings.
When a new upgrade appears, ask which zone it improves. If the answer is unclear, wait. Romestead rewards stability because survival pressure punishes overextension. A compact, well-supplied town often beats a larger town that cannot move resources to the place where they are needed.
Common resource mistakes that slow a settlement
The first common mistake is spending the last reserve. It feels efficient because the resource counter is being used, but it removes your recovery option. Keep a small buffer of food, repairs, and basic materials before starting a risky expansion or combat push.
The second mistake is building too far from storage. New production looks useful, but if every trip is long, the same workers complete fewer actions. Fix travel before assuming the answer is more production. A better-placed storage point can outperform another building.
The third mistake is following old exact values without checking version context. Early Access games can change recipes, balance, and building behavior. Use current official sources for numbers, and use this page for the strategic logic that remains useful even when values shift.
| Mistake | Why it hurts | Better habit |
|---|---|---|
| Spending every reserve | No buffer for repairs, food drops, or wave recovery | Protect a small critical reserve |
| Scattered storage | Workers lose time moving instead of producing | Place storage near the chain it supports |
| Queueing every upgrade | Crafting hides the real bottleneck | Queue survival, logistics, then optional projects |
| Trusting stale numbers | Old values can mislead after updates | Check Steam and current wiki pages for exact data |
Romestead resource planning checklist
| Check | What to verify | Why it matters |
|---|---|---|
| Food reserve | The settlement can absorb a short disruption | Prevents worker collapse during pressure |
| Basic materials | Construction and repair inputs are not emptied | Keeps recovery possible |
| Storage access | Key materials sit near the jobs that use them | Reduces wasted carrying time |
| Tool chain | Required tools and workstations exist before adding workers | Prevents fake productivity |
| Update context | Exact costs come from current Steam/wiki data | Avoids following stale Early Access values |
Romestead resources FAQ
Sources and current-value checks
- Official Romestead Steam page - Primary source for current game status, screenshots, trailers, and update context.
- Romestead Resources wiki page - Current wiki entry for resource categories and game data checks.
- Romestead Tools wiki page - Useful reference for tool dependencies and crafting context.